Review: The Red-footed Falcon Tower – Europe’s Best Raptor Photography Spot?
In the world of wildlife photography, "raptor" usually implies "pain." It implies hiking up mountains with 15kg of glass to find an eyrie. It implies sitting in a cramped canvas tent for 12 hours, praying the bird lands on the one branch that isn't backlit. And most of all, it implies the "Raptor Neck"—the chronic ache that comes from pointing a 600mm lens at the sky for days, resulting in thousands of images of dark bird bellies against a blown-out white sky.
So, when whispers started circulating in the European nature photography community about a specific site in Hungary—a "Tower Hide" situated in the middle of a massive Red-footed Falcon colony—we had to investigate. The claims were bold: eye-level shots of mating falcons, clean green backgrounds, comfortable seating, and hundreds of interactions per hour.
Is it a tourist trap, or is it the holy grail of avian photography? We sent a team to the Heves Plain, equipped with the latest high-resolution mirrorless bodies and super-telephotos, to put Ecotours’ Red-footed Falcon Tower to the test.
Here is our deep-dive review.
The Subject: Why the Red-footed Falcon?
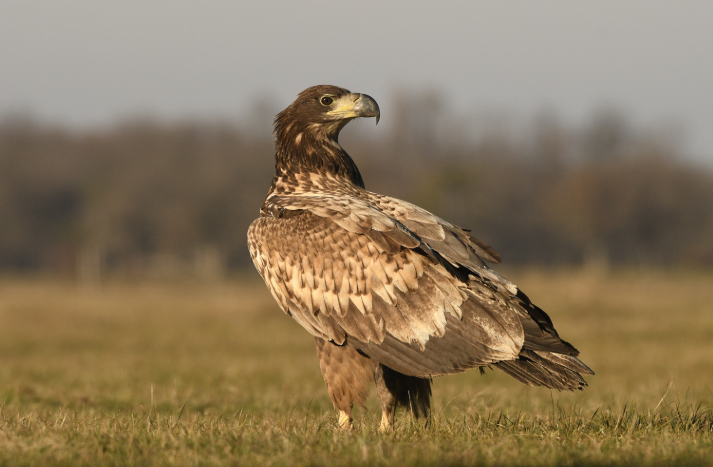
Before we talk about the infrastructure, we must talk about the model. The Red-footed Falcon (Falco vespertinus) is arguably Europe’s most photogenic raptor.
-
The Male: A slate-grey phantom with rusty-red "trousers" and legs.
-
The Female: A stunner with an orange-rufous head and underparts, and a barred grey back.
Unlike the stoic Golden Eagle, these falcons are social, loud, and hyper-active. They nest in colonies (often taking over abandoned rookeries). This means that once you are in position, you are not waiting for a bird; you are surrounded by birds.
The behavior is the hook. During mating season (May-June), the males perform "food passes." They hover in mid-air or land on a branch to hand over a lizard or a vole to the female. It is high-speed, high-contrast action.
The problem? They nest high in the canopy. From the ground, you are shooting at a 60-degree angle. You get the belly, but you lose the story. You lose the eye contact.
The Infrastructure: Engineering the Perfect Angle
This is where Ecotours has changed the game. They haven't just put a tent near a tree; they have engineered a solution to the "angle of incidence" problem.
The Tower Specs
The hide is a permanent wooden structure built on stilts, elevating the photographer roughly 6 to 8 meters (20-26 feet) off the ground.
-
Stability: This is critical. A tower that sways in the wind is useless for long-lens photography. The Ecotours tower is anchored deep. We tested it with three photographers moving around and gimbal heads swinging. The vibration was negligible.
-
The Height: The floor of the hide puts your lens exactly level with the nesting boxes and the primary perches.
-
The Background: This is the killer feature. Because you are up in the canopy, your background is not the bright sky; it is the distant foliage of the next tree line. This allows for that creamy, diffuse green bokeh that separates professional work from amateur snapshots.
Comfort Level: 9/10
Inside, the hide is surprisingly spacious. It features carpeted floors (to dampen sound), adjustable swivel chairs, and dedicated shelving for bean bags or gimbal heads. It is ventilated, which is essential because the Hungarian steppe can get hot in June. There is even a rudimentary gravity-flush toilet system nearby—a luxury in the birding world.
The Glass: The Elephant in the Room
Let’s address the controversy. The Ecotours Tower utilizes One-Way Mirror Glass (Spy Glass).
For the purist, shooting through glass is often considered a sin. The fear is loss of sharpness, loss of light, and autofocus confusion. We tested the glass rigorously using a Sony A1 with a 600mm f/4 GM and a Nikon Z9 with the 800mm PF.
The Findings:
-
Light Loss: We measured a light loss of approximately 1.3 to 1.5 stops. In the modern era of ISO-invariant sensors, this is irrelevant. We were shooting at 1/3200s, f/4, ISO 1600-3200, and the files were clean.
-
Sharpness: We found zero perceptible degradation in sharpness in the center of the frame. The feathers were resolved down to the barbules.
-
Color Cast: There is a very slight warming effect, easily corrected in Lightroom by adjusting the White Balance tint by -5 to -10.
-
The "Invisible" Advantage: This is the trade-off that makes it worth it. Because the birds cannot see you, their behavior is 100% natural. They land on perches 4 meters away. They mate directly in front of the glass. If we were in an open-front hide, our lens movement would have flushed them instantly.
Verdict on Glass: The trade-off is overwhelmingly positive. The intimacy gained outweighs the stop of light lost.
The birds are habituated to the hide
The Shoot: A Day in the Tower
The experience begins early. Ecotours guides drive you to the tower before dawn to ensure your entry doesn't disturb the colony rhythm. You climb the ladder, set up your gimbal, and wait.
As the sun rises, the "One-Way" effect kicks in. The outside world brightens, turning the glass into a mirror for the birds, while you sit in darkness.
Then, the chaos begins.
The Density of Action
In a typical 4-hour morning session, we logged:
-
30+ Mating encounters: The male landing on the female’s back, wings spread.
-
50+ Food passes: Males bringing in crickets, lizards, and voles.
-
Constant aerial combat: Kestrels and Jackdaws trying to raid nests, with the Falcons dive-bombing them.
The challenge is not finding a subject; it is choosing one. The sheer number of birds means you have to be disciplined. You have to pick a specific perch or a specific light angle and wait for the bird to enter your stage.
The "Studio" Setup
Ecotours has curated the environment. They have placed "photogenic" perches—weathered branches with nice textures—at ideal distances from the hide (approx. 5-8 meters). These perches are positioned to ensure the background is far enough away to be rendered as a smooth wash of color (bokeh), but close enough that the bird feels comfortable using them as a staging post before entering the nest box.
Technical Analysis: Managing the Shoot
For the gear-heads reading this, here is how the tower challenges your equipment and skills.
1. Focal Length Strategy Most photographers bring their longest lens (600mm or 800mm). In the Tower, this is often too much.
-
The Sweet Spot: A 400mm f/2.8 or a zoom like the 100-500mm/200-600mm is actually superior here. When a falcon lands 4 meters away, a 600mm lens will crop off the tail or wings.
-
The Two-Body Solution: We recommend setting up a 600mm on a gimbal for the "portrait" shots and having a 70-200mm or 300mm hand-held (or on a second bean bag) for the close-ups and flight shots.
2. Autofocus Settings Shooting through glass requires a slight tweak in technique.
-
Limiter: Set your lens focus limiter to "5m - Infinity." This prevents the AF from hunting on the glass surface itself if you lose the bird.
-
Stickiness: We found that increasing the "Tracking Sensitivity" (making the AF 'stickier') helped. If a bird flies behind a branch or another bird crosses the frame, you don't want the focus to jump instantly.
3. Exposure The falcons are high-contrast. The males are dark grey; the females have bright orange heads.
-
Metering: Matrix/Evaluative metering works well, but watch the histogram. The dark feathers of the male can fool the camera into overexposing. We recommend dialing in -0.3 to -0.7 EV compensation to protect the highlights on the female’s head and preserve the rich texture of the male’s grey plumage.
The "Ecotours" Difference
It is important to note that you cannot just show up at this tower. It is owned, maintained, and guarded by Ecotours.
This exclusivity is a major pro.
-
Crowd Control: The tower accommodates 3-4 photographers comfortably. Ecotours limits the group size. You are not fighting for elbow room.
-
Conservation First: This is the ethical backbone. The falcons are here because Ecotours and their partners installed the nest boxes. The revenue from the hide rental pays for the maintenance of the colony. The birds are habituated to the hide, meaning your presence does not cause stress.
-
The Guide: The Ecotours guides are photographers themselves. They know the light. They know the wind direction. They will tell you, "Watch that left perch, the male usually lands there before entering box #4." That local knowledge is worth the price of admission.
The Verdict
Is this Europe’s best raptor photography spot?
If you judge "best" by the reliability of sightings, the quality of the background, and the comfort of the shooting environment, then yes.
There are places to photograph Golden Eagles in winter snow, or Sea Eagles in Norway, which are spectacular. But those are often tests of endurance with low hit rates.
The Red-footed Falcon Tower is different. It is an "Action Studio" in the wild. It delivers a volume of high-quality opportunities that is unmatched. You will fill a 128GB card in a morning. You will delete 80% of them, and you will still be left with 50 portfolio-grade images.
For the luxury traveler or the serious pro who wants to maximize their time, this is the most efficient, productive, and enjoyable raptor shoot on the continent.
Pros:
-
Eye-Level Perspective: Game-changing for backgrounds.
-
Proximity: frame-filling shots at 300-400mm.
-
Comfort: Chair, carpet, shelf system.
-
Volume: Hundreds of birds, constant action.
Cons:
-
Heat: Mid-day in July can be warm (though morning/evening sessions avoid this).
-
Glass: Requires discipline (black clothes, lens skirts) to avoid reflections.
Final Score: 4.8/5 Stars
Sidebar: The Gear Bag – What to Pack for the Tower
-
Primary Lens: 400mm f/2.8 or 500mm f/4. (600mm is tight, but usable for headshots).
-
Secondary Lens: 70-200mm f/2.8 or 100-400mm zoom. Crucial for "environmental" shots and when birds land close.
-
Camera Body: High frame rate (20fps+) is a huge advantage for the food pass action.
-
Support: Gimbal Head is highly recommended. Ecotours provides plates/beanbags, but a gimbal makes flight tracking easier.
-
Accessories:
-
Lens Skirt/Black Cloth: Essential to block reflections on the glass.
-
Black Shirt: Do not wear white or bright colors inside the hide.
-
Fast Memory Cards: You will be shooting bursts. CFexpress Type A/B is preferred.
-
Sidebar: Camera Settings Cheat Sheet (Optimized for Ecotours Glass)
-
Shutter Speed: Minimum 1/2000s (Action), 1/3200s (Mating/Flight).
-
Aperture: f/4 to f/5.6. (Stopping down slightly helps depth of field through glass).
-
ISO: Auto ISO (Limit 6400).
-
Focus Mode: Continuous AF (Servo).
-
Focus Area: Zone or Expand Spot (Single point can be too hard to keep on a fast-moving falcon).
-
Drive Mode: High+ (20fps or 30fps).